When installing vCloud Director in my homelab, I ran into an issue where the vCloud Director Agent cannot be installed into the ESXi host since the host is ran using VMware Auto Deploy. Installing that agent is useless because after a reboot, the ESXi host would be clean again. In vCloud Director you’ll be presented with an error during install: “The vCloud Director Agent version 1.5.0.453916 is required to be part of the boot image in order to prepare the host”.
Alan Renouf has a nice blogpost on this and how to solve it using PowerShell http://www.virtu-al.net/2011/10/03/auto-deploy-and-vcloud-director/ . Well, I’m not that much of a PowerShell wizard and since a few days a big fan of Auto Deploy GUI, so I tried to do the same using the Auto Deploy GUI.
Step 1: Get the vCloud Director Agent
After installing your vCloud Director cell, you’ll find the vCloud Director Agent on that VM in /opt/vmware/vloud-director/agent/vcloudagent-1.5.0-453916.zip. Copy that zip file to a location where you can later on access it from your Windows desktop where the VI Client is running.
Step 2: Add the VIB to the depot
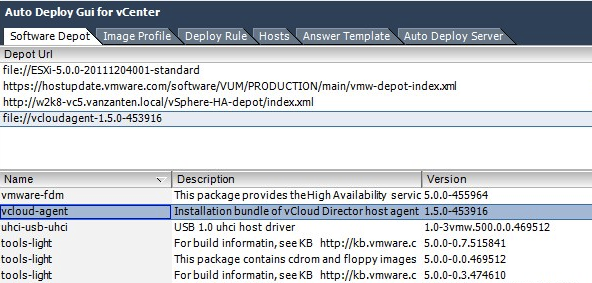
Click on the Software Depot tab and then right click to choose “Add Zip Repository” and add the ZIP file you just copied. In the bottom half of the screen you should now see the “vcloud-agent”.
Step 3: Make a new deploy image
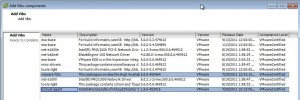
Personally I like to use a different name for this image to make clear to me that this is a custom made image. Go to the “Image profile” tab and choose the ESXi5 image you want to use. Right click the image and choose CLONE. Give this new image a name. I used the ESXi-5.0.0-20111204001-standard image and changed the name to vCloud-ESXi-5.0.0-20111204001-standard. On the “Commit Change” question, click “NO”. Now make sure your image is selected in the top half and then check the list of modules in the bottom half. The vCloud Agent will NOT be there yet. Now right click the new image and select “Add Software Package”. In the wizard select the vCloud-Agent and finish the wizard. On the “Commit Change” question now click “YES”. In the task pane you should see a bundle being created. In my homelab it stays at 20% forever and then jumps to finish, mostly because it has to download stuf in the background. Just be patient and get some coffee. To save some time for the next time I want to use this image or edit it, I also do an export of the image.
Step 4: Create a new rule
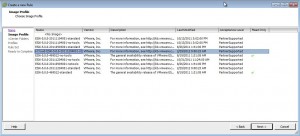
Switch to the “Deploy Rule” tab and right click and select “Add” to create a new Deploy Rule. The wizard is very straightforward. Select the image you created, the host profile you want to attach and how to select your host (Vendor ID, IP address, Mac Address, etc).
Step 5: Connect the host to the image
On the “Hosts” tab you can now see your newly created rule and the old rule to which the host is connected. When you now right click one of the hosts and choose “Test Deploy rule compliance” and if needed “Repair Deploy Rule set”.
Step 6: Reboot your hosts
After Step 5 you’re actually ready to deploy the new image to your hosts. Put them in maintenance mode and reboot. When the host is available again you of course want to see if the vCloud Agent has been installed. Unfortunately this can’t be seen in the VI Client and you have to switch back to PowerShell. Mister Alan Renouf of course has a nice PowerShell oneliner for this:
Connect-VIServer MyVIServer -User Administrator –Password “Pa$$word”
 Get-VMHost | Sort Name | Foreach {
 $ESXCLI = Get-EsxCli -VMHost $_ -ErrorAction SilentlyContinue
 $ESXCLI.software.vib.list() | Where { $_.Name -like "*vCloud*"} | Select @{N="VMHost";E={$ESXCLI.VMHost}}, Name, Version
 }
For me the result on my three ESXi hosts was:
autoesx02.vanzanten.local   vcloud-agent   1.5.0-453916
autoesx03.vanzanten.local   vcloud-agent   1.5.0-453916
Which told me that these hosts did have the vCloud Agent and my first host didn’t. (Hadn’t rebooted yet). After this you can continue your vCD installation. Have fun!


Thanks for the mention