When preparing your Virtual Infrastructure environment for vSphere 5 and vCenter 5 you also need to think of all the vCenter applications that are dependent on vCenter. One of them is vCenter Heartbeat. To be able to run vCenter Heartbeat on vCenter 5 you will need to upgrade vCenter Heartbeat to version 6.4. Normally upgrading vCenter Heartbeat isn’t a big deal but there has been a change from 6.3 Update 1 to 6.4. Where you could normally use a configuration of “identical nodes”, you will now have to switch to “non-identical nodes” according to KB 1014435.
From the KB article: “Important: When performing an upgrade to vCenter Server Heartbeat 6.4 from 6.3 Update 1 with Identical nodes or from any previous version, you must first migrate from Identical nodes to Non-Identical nodes before performing the upgrade.”
Switching “identical” to “non-identical”
To switch your configuration from “identical” to “non-identical” nodes you can use KB 2002112 “Migrating vCenter Server Heartbeat 6.3 Update 1 and later from identical nodes to non-identical nodes”, but it needs some additions.
First there is the following note in the KB: “Note: This procedure reconfigures vCenter Server Heartbeat 6.3 Update 1 and later installed in a LAN environment where vCenter Server and SQL Server are protected but not installed on the same machine (remote SQL Server).” However, this procedure DOES work for locally installed SQL Servers as well. In my testlab it even worked with SQL Express, even thought SQL Express is NOT SUPPORTED.
Second difference between real world and KB is that you will need to reconfigure your vCenter networking, but there is no mention of that in the KB. Below is the procedure I followed IN A LAB ENVIRONMENT when testing the upgrade for a customer of mine.
Test environment:
- Primary server: vCent01
- Public IP: 192.168.233.10
- Heartbeat interfaces: 10.0.0.1 and 10.0.5.1
- Secondary server: vCent01 (because it’s a clone of vCent01)
- Public IP: 192.168.233.10 (because it’s a clone of vCent01)
- Heartbeat interfaces: 10.0.0.2 and 10.0.5.2
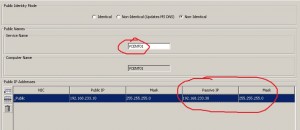
When upgrading to heartbeat 6.4 and switching to “non-identical” nodes, you’ll need new server names and an extra public (passive) IP address for your primary and secondary vCenter.
- Primary server: vCent00 will be the new name
- Passive Public IP: 192.168.233.20
- Secondary server: vCent02 will be the new name
- Passive Public IP: 192.168.233.30
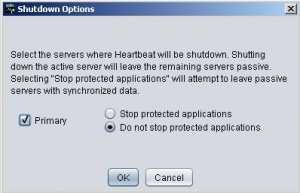
Following the first steps of KB 2002112, shutdown vCenter Heatbeat on both servers leaving the applications running. Do this through the VMware vCenter Heartbeat Management console.
On the Secondary Server part, follow steps 1 through 3.
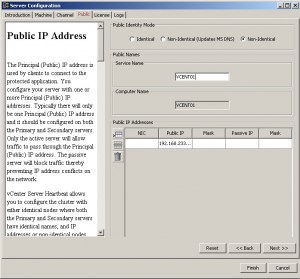
Re-enter the “Service Name”. In my case this is “VCENT01”. Steps 4 and 5 tell you to assign the Principal Public IP and the passive IP in step 7. When entering the correct IP addresses, you will run into a problem later on after removing the secondary server from the domain and trying to re-add it. The Windows network stack is not update with the configuration change in IP you make here. To solve this set the IP on the network interface to 192.168.233.30. Then use this as the passive IP address and keep 192.168.233.10 as the public IP address.
Proceed with steps 8 through 11. Step 12 explains how to rename the secondary server, in my case the new name will be vcent02. Use the last steps to rejoin the server to the domain. Then proceed to the primary server and also change its IP address at Windows level like we did with the secondary server and later on change the server name to vCent00. The primary server doesn’t need to be removed from the domain.
Upgrade VMware vCenter Heartbeat 6.3 update 1 to 6.4
After you completed these steps, make sure your VMware vCenter Heartbeat is running fine again. You might need to wait some time for the file sync to complete. After everything is running smooth again, the next step is the upgrade itself. This is a fairly straight forward procedure, outlined in KB 1014435 titled: “Upgrading vCenter Server Heartbeat from an earlier version to a later version”.


Vmware’s KB article is definitely lacking – I just ran into all the same issues as you.
Hope this post helped :-)
The ODBC & ODBC32 systemDSN must be changed from the original server name to localhost or 127.0.0.1 otherwise the switchover to the secondary server will be unsuccessful (vpxd not found and kerberos error) . I just finished a service call with Vmware on this issue and despite the simplicity of the solution, it is not mentioned in any of the literature on this issue.